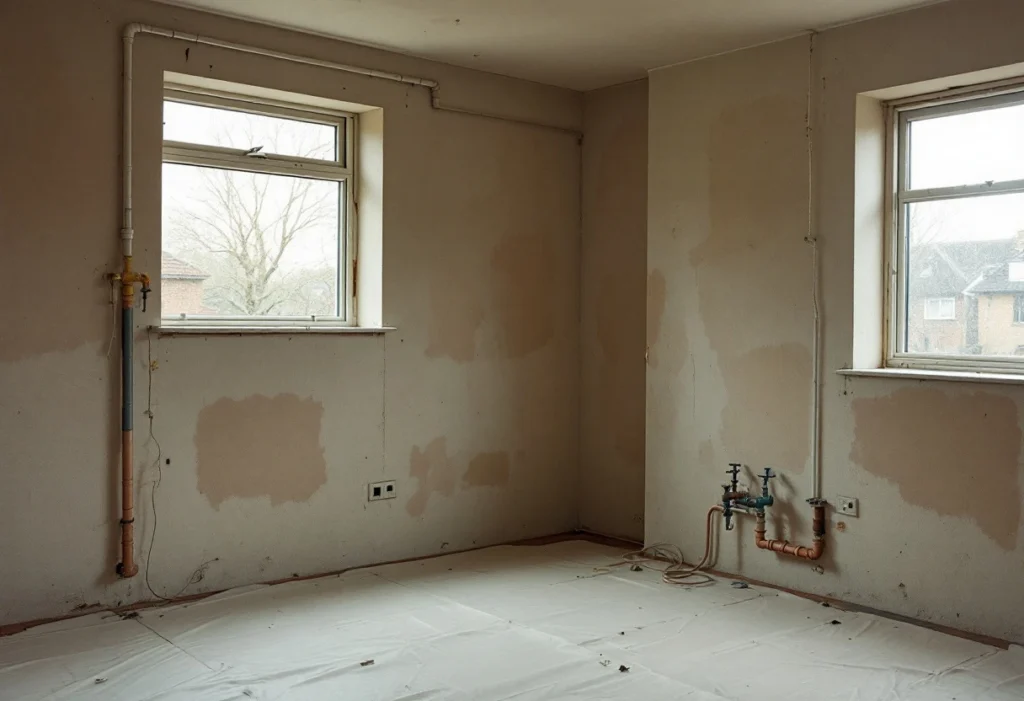
A kitchen installation is several trades working in one room, one after another. Each needs the one before it to finish, and several wait on parts made or delivered to order. Knowing the order lets you plan cooking, storage and access around it.
This guide covers what to settle before the start, each stage in order, what sets the length of the job and what you should have at the end. It does not cover cost or design. Kitchens can be booked with us as a standalone job; see our kitchen fitting service for what that includes.
What needs to be settled before the start date?
- Final measurements and layout sign-off. The positions of the sink, hob, oven, extractor and appliances decide where pipes and cables go. Choose the appliances now and keep their fitting instructions. Before work starts you get a written scope with the quotation. It states what is included, what is not, and what is provisional because it cannot be known until the old kitchen is out.
- Deliveries and storage space. Agree delivery dates with whoever supplies the units and set aside a dry, secure room or garage to store them. Check each delivery against the order when it arrives, so a missing or damaged unit is found early.
- Clearing the room. Empty every cupboard, take down anything on the walls and clear a route from the front door for old units going out and new ones coming in.
- A temporary kitchen elsewhere in the house. Pick a room with sockets and, ideally, a tap nearby. The next section covers what to set up.
Parking and a skip. Check where a van can stop for loading. You or the skip hire company need a permit to put a skip on a public road. In most areas the skip company gets it, but in some you apply yourself, and lights or markings may be needed[10].
Cooking and washing up while the kitchen is out
From strip-out until the sink and worktop are in, the kitchen cannot be used. A common set-up is a kettle, microwave and fridge in another room, a table for preparing food, and a basin or bowl for washing up. Whether you can stay in the house depends on the job, and we say so at the site visit. Dust, noise, access and when to consider staying elsewhere are covered in our guide to temporary household arrangements.
What happens during a kitchen installation, in order
Work is carried out in the order the trades need: structure, then services, then finishes. Anything that departs from the scope is agreed with you before it is built.
1. Strip-out
The water, power and gas to the kitchen are isolated, then the old units, worktops, tiles and sometimes the floor come out. Disconnecting or moving a gas hob or cooker is work for a Gas Safe registered engineer[4]. Asbestos can be present in any building built or refurbished before 2000[5]. HSE lists places in a house that a strip-out can reach, such as vinyl floor tiles and their adhesive, textured coatings such as Artex, and boards behind a fuse box[6]. If a material may contain asbestos, work on it must stop at once[5].
2. First fix
With the walls open, pipes and cables are run to the new positions: water and waste for the sink and appliances, and cables for sockets, lights, the oven, hob and extractor. Moving the sink or adding drainage for a dishwasher may need building regulations approval[1]. A complete new circuit or a new consumer unit is notifiable. It must be done by an installer registered with a competent person scheme, who self-certifies it, or building control must be told before work starts. Adding a socket to an existing kitchen circuit is not notifiable in England[2]. Existing extract ventilation must be kept or replaced, so any new duct is run now[7].
3. Making good and plastering
Chases are filled and damaged plaster is patched, or the walls are skimmed or boarded. The Tile Association advises that gypsum plaster should cure for at least four weeks, and be dry, before it is tiled[8]. That is general guidance for the material, and one reason splashback tiling comes late.
4. Fitting the units
Base units are set out, levelled and fixed, then the wall units, tall housings, end panels and plinths. Uneven floors and walls take longer to work around. Doors and drawers are hung and adjusted, then checked again at the end.
5. Worktop templating and fitting
Worktops cut on site are fitted straight after the base units. Stone worktops are made to a template instead. The Stone Federation's code of practice says the supporting units must be in position before the template is taken, and the sink and any electric hob needing cut-outs should be on site[9]. The tops are then made off site and fitted later. That lead time, set by the fabricator, often decides when the kitchen is usable.
6. Appliances
Integrated appliances go into their housings, following each maker's fitting instructions. A gas hob or cooker must be connected by a Gas Safe registered engineer[4]. Where the job includes gas work, we arrange it through a subcontracted gas engineer.
7. Second fix
Sockets, switches, lights and the extractor are connected, and the tap, waste and appliance valves are fitted. All electrical work should follow the safety standard BS 7671[2].
8. Tiling and flooring
Splashback tiles go on once the worktops are fitted, because they sit on the worktop. A new floor is laid either before the units or up to the plinths afterwards. That choice is made at layout sign-off, because it changes the unit heights and how appliances slide out.
9. Commissioning and certificates
The water is turned on and every joint is checked for leaks. The appliances, extractor and lights are run and checked. Where a registered electrician carries out notifiable work, you should receive an Electrical Installation Certificate or Minor Works Certificate confirming it meets BS 7671, and a Building Regulations Compliance Certificate[3].
What sets the length of the job?
No single figure fits every kitchen. The length comes from four things: how far the services move, how much plastering is needed and how long it must dry, the lead times for anything made to order, and how quickly the finishes are decided. The table shows where each one applies.
What each stage depends on
| Stage | What has to be ready first | What sets how long it takes |
|---|---|---|
| Before the start | Layout signed off, appliances chosen, room cleared | How quickly measurements, layout and finishes are agreed; delivery dates |
| Strip-out | Services isolated; gas disconnected by a Gas Safe registered engineer[4] | What is found behind the old units; any suspected asbestos, which stops work on it at once[5] |
| First fix | Final positions of sink, hob and appliances | How far services move; any building regulations approval or notification[1][2] |
| Making good and plastering | First fix finished | How much plastering is needed; curing and drying before tiling[8] |
| Units | All units delivered and undamaged | Number of units; how level the floor and walls are |
| Worktops | Base units fixed; sink and hob on site for a template[9] | Cut on site, or made off site after templating |
| Appliances and second fix | Worktops fitted | The gas engineer's visit; electrical testing |
| Tiling and flooring | Worktops in; plaster cured and dry[8] | Floor area, tile size and pattern |
| Commissioning and snagging | All trades finished | The length of the snag list; any parts on order |
Scroll sideways to see all columns
Common hold-ups and how to avoid them
- A unit arrives short or damaged. Fitting stops at that unit, and so may the worktop template. Checking deliveries on arrival gives time to replace it.
- Something is found behind the old kitchen. Damp, rot, old wiring or an uneven floor only show once the units are out. Any extra work is agreed with you before it is built.
- A change after the template. Moving the sink or swapping the hob after templating means a new template, and the lead time starts again.
- Tiles chosen late. Tiling is near the end, so a late choice or a long delivery holds up the finish.
Plaster not ready to tile. The tiling date follows the plaster, which should be cured and dry first[8].
Snagging and handover
Before the trades leave, walk the kitchen with a list. Check that doors line up, drawers run fully, sealant and grout lines are even, worktop joints are tight and every appliance, light and socket works. Run the tap and dishwasher, then look under the sink for drips. At handover you receive the certificates and sign-offs that apply to the work done. Keep them with the appliance manuals. How to record snags, and what happens after handover, is covered in our guide to snagging and aftercare.