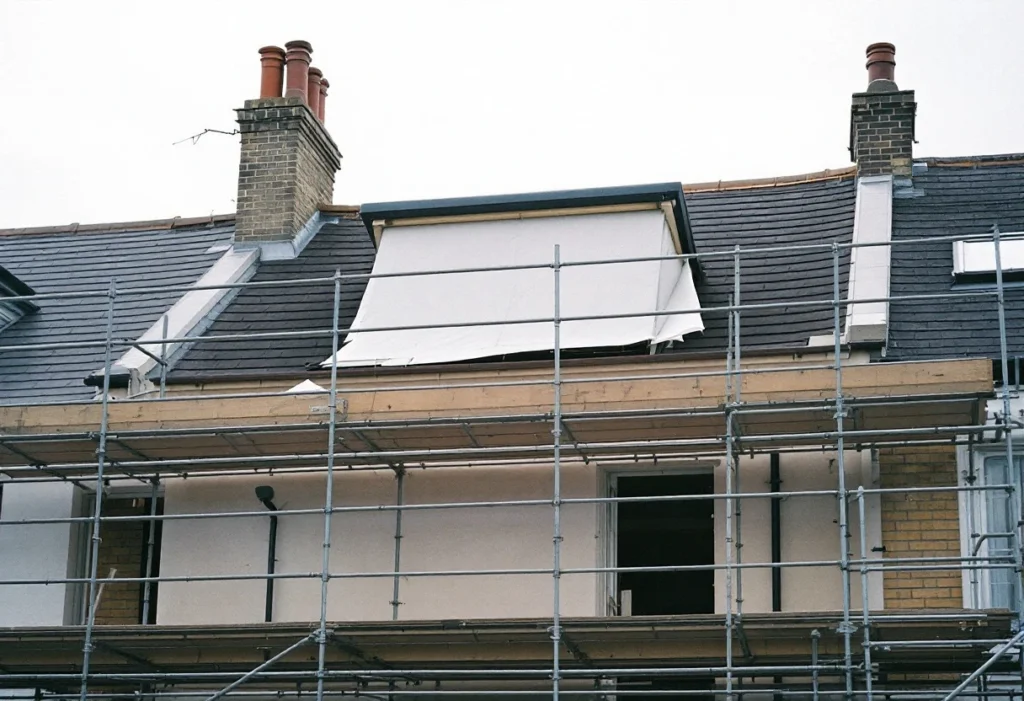
A loft conversion is built from the roof down. The structure goes in first, above the rooms you live in. The staircase and the fire protection of the escape route come later, and they pass through the floors below. So the disruption is uneven: some stages are barely felt downstairs, and others reach every floor.
This guide sets out the stages in their usual order, what sets the length of each, and where the disruption falls. It gives no week-by-week timetable, because each stage depends on the design, the house and the method. For the work itself, see our loft conversion service.
What has to be in place before work starts?
Approvals and notices often fix the start date. Four things come first:
- Planning and drawings. Planning permission or confirmation of permitted development, then Building Regulations drawings with the structural engineer's design. The design fixes each beam and where it bears.
Party wall notices for the steels. Cutting into a party wall to take the bearing of a beam needs notice at least two months before that work starts[1]. If the neighbour has not replied within 14 days, a dispute is deemed to have arisen and surveyors draw up an award[1].
Notice before work starts. Building control must be given notice at least two days before the work begins[2].
A pavement licence, if needed. Merton Council, for example, requires a licence before scaffolding goes up on the pavement, and the scaffold company or contractor applies for it[3].
With the quotation you get a written scope: what is included, what is not, and what is provisional until the roof is opened. Design, structural engineering, planning and Building Control submissions can be arranged through us, or we can build from your designer's drawings.
The stages, and what sets the length of each
This is the usual order for a dormer or hip-to-gable conversion; a rooflight conversion has a smaller roof stage. On our jobs the work runs in the order the trades need: structure, then services, then finishes.
What sets the length of each stage
| Stage | What sets how long it takes | What it means at home |
|---|---|---|
| Before work starts | The planning route, the drawings, the party wall notice period[1], the two-day notice to building control[2] and any pavement licence[3] | Nothing changes in the house yet |
| Scaffolding and access | The shape of the house, access to the rear, and whether the scaffold stands on the pavement | Scaffold outside the upper windows for the roof stages |
| Roof opening and dormer or hip structure | The type and size of the conversion, and the weather while the roof is open | Noise and vibration overhead; the top-floor rooms feel it most |
| Steels and floor joists | The number and size of the beams, how they are lifted in, and the structural inspection[8] | Heavy, loud work above the top-floor ceilings |
| Roof covering and windows | The roof finish, the number of windows, and whether they are on site when the shell is ready | Once watertight, the risk to the rooms below falls away |
| Insulation | The insulation in the slopes and dormer, any sound insulation to the neighbour's loft[4], and the inspection[8] | Quiet work, kept within the loft |
| Staircase and escape route | Where the stair can land, and how many doors and partitions below need fire protection[7] | Work reaches the floors below: the landing ceiling is opened[6] |
| First fix | The number of new circuits, any en-suite plumbing and drainage, and the routes for pipes and cables | Power or water may be off while connections are made |
| Plastering | The area of walls and ceilings, and drying before decoration | A wet trade; dust in the loft and the stairwell |
| Second fix | The number of sockets, lights, sanitary fittings, doors and pieces of joinery | Mostly inside the loft |
| Finishes | Flooring, decoration, and how late the choices are made | Mostly inside the loft |
| Completion | The final inspection and the certificates[8]; the completion notice is due within five days[2] | Clean-up and handover |
Scroll sideways to see all columns
1. Scaffolding and access
The scaffold goes up first, so the roof can be worked on safely. If it stands on the pavement, the licence must be in place beforehand[3]. Agree at this point where materials come in and where waste goes.
2. Opening the roof and building the dormer or hip structure
An opening is normally cut in the existing rafters for the dormer, window or rooflight. The cut rafters are then carried by the dormer or by new timbers called trimmers[5]. A dormer is generally built in timber, with a roof, side cheeks and a front wall. Next to a neighbour, it may need to resist fire spreading between the houses[5].
3. Steels and floor joists
The existing ceiling joists are unlikely to carry a floor. New joists go in, normally between the old ones, and they will probably be larger[4]. Steel or timber beams carry the extra load and need adequate support and fire resistance[4]. This stage can overlap the last one; the engineer's design sets the order.
4. Roof covering and windows: making it watertight
The dormer roof and cheeks are covered and the windows or rooflights fitted, and the loft is now watertight. The windows are not the way out in a fire: escaping through a window from above first floor level is too dangerous[7].
5. Insulation
Insulation goes into the roof slopes and the dormer. Sound insulation is needed between habitable rooms. On a terraced or semi-detached house, building control may also ask for it towards the neighbour's loft[4]. Some bodies inspect the timbers and insulation as a stage[8], so boarding waits for that visit.
6. Staircase and fire protection of the escape route
The new rooms need a new stair. A space-saving stair may be possible where a full one will not fit, but retractable ladders are not normally acceptable[6]. The opening is cut through existing ceiling joists and trimmed[6]. In a typical two-storey house, new fire-resisting doors and sometimes partitions protect the stairway. Mains-powered, interlinked smoke alarms go in the stairway at each level[7].
7. First fix
Cables, pipes, waste runs and ducts are run before the walls are closed. A new circuit or consumer unit is notifiable electrical work. Either an installer registered with a competent person scheme does it and self-certifies, or the building control body or a registered third-party certifier is notified before work starts[9].
8. Plastering
Boards are fixed, taped and skimmed. Walls that separate the new rooms from the rest of the house may need to be fire resistant[4]. Decoration waits until the plaster is dry.
9. Second fix
Sockets, lights, sanitary fittings, doors and joinery go in. Fire doors and their closers are checked at completion[8].
10. Finishes
Flooring and decoration come last. Choices made late delay this stage more than any other.
11. Completion
The final inspection follows, and the completion notice is due within five days of the work being finished[2].
What can change the programme?
- Weather. Rain and wind can stop work while the roof is open.
- What opening up reveals. Timbers, walls and services stay hidden until opened, which is why the scope lists provisional items.
The party wall award. If the neighbour does not consent, work to the shared wall is programmed around the award[1].
Inspections. The inspector visits at pre-agreed stages when you or your builder ask[11], and work that must be seen waits.
- Changes. Anything that departs from the scope is agreed with you before it is built, and agreeing it takes time.
- Made-to-measure items. A stair or special windows must be ordered to arrive when their stage is ready.
Where the disruption falls at home
Early work happens on the scaffold and in the roof, so the rooms below hear it more than they see it. The work comes into the house when the stair opening is cut through the landing ceiling[6] and new fire-resisting doors go in on the escape route[7]. First fix can mean short power or water cuts, and plastering adds dust.
Noisy work keeps to set hours. Merton Council's guidance, for example, is 8am to 6pm on weekdays and 8am to 1pm on Saturdays, and not normally on Sundays or bank holidays[10]. Before the start, clear the loft and the landing, move fragile things off the top floor, and agree where materials and waste go.
Whether you can stay in the house depends on the job, and we say so at the site visit. The guide on planning household arrangements covers the practical side.
Building control inspection points
A registered building inspector checks the work at pre-agreed stages to make sure it appears to comply[11]. The stages vary between bodies. Merton Council's list for loft conversions shows the pattern[8]:
- Commencement: may be combined with the steel visit.
- Steel beams: once the beams are installed.
- Timbers and insulation: combined with the steel visit where feasible.
- Drainage connections: only where there are any, such as for an en-suite.
- Completion: fire doors and closers, smoke alarms, fire resistance, stairs and handrails, ventilation, headroom, means of escape and installer certificates.
For what each visit checks, see building control inspections during the conversion. A completion certificate is issued only if no contraventions are apparent after the final inspection[11].
Handover and snagging
At handover you receive the certificates and sign-offs that apply to the work done. On a loft conversion that usually means the completion certificate and the installer certificates for self-certified work[8]. Keep them with the house's papers. Building control looks at compliance with the regulations, so the paint, the joinery and the way each door hangs go on a snagging list instead. See snagging and aftercare for how that list is drawn up and closed out.