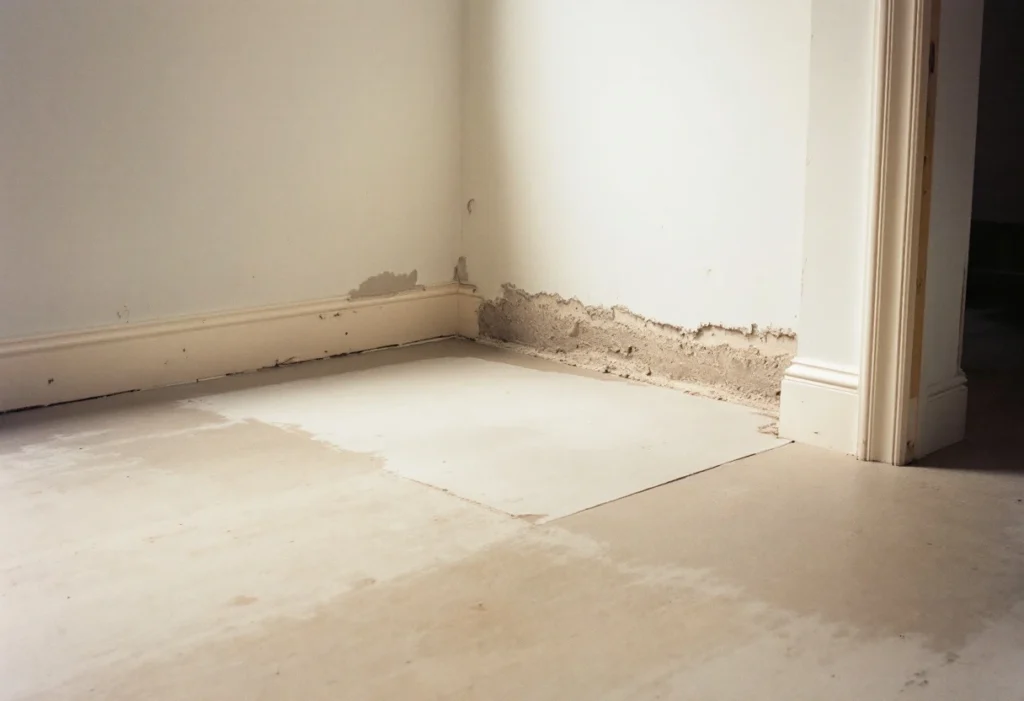
A new tiled or wood floor is only as stable as the base under it. That base has to be identified, checked and prepared before anything is laid, and the edges matter as much as the middle.
This guide sets out the checks in order, the published drying and flatness guidance, and who lifts the old floor. It does not cover choosing a floor or diagnosing one that has failed. Both floor types are part of our flooring services, and each can be booked as a standalone job.
What to have ready before the floor is checked
Settle these first, because the checks depend on what is going down:
- The floor you want. Tile or wood, and the type: porcelain, ceramic or stone; engineered or solid boards.
The product's instructions. The adhesive, boards, underlay and any membrane each have a data sheet or installation instructions. The Tiling Guide refers to the maker's data sheets and recommendations at several steps[2]. They set the moisture, flatness and fixing details.
- What is down now, and the building's age. Age matters for old vinyl and floor tiles, covered below.
- Underfloor heating. Whether it is in or planned, and whether it is a water or an electric system.
- Other work in the room. A new kitchen, new doors, skirting or plaster changes when the floor goes down.
How a subfloor is checked, step by step
1. Find out what the existing floor is
The common bases are a sand and cement screed, a calcium sulfate (anhydrite) screed, a concrete slab, timber boards on joists, and a chipboard deck. Many have an old covering on top. The base often shows only once that is lifted, so its condition stays provisional until then.
2. Check the condition and stiffness
Tiling guidance is that a base must be clean, dry and dimensionally stable, able to carry the tiling for the traffic it will get[2]. The checks differ by base:
Screeds and slabs. Cracks, hollow patches and old adhesive are noted. A calcium sulfate screed forms a weak surface layer, called laitance, which is abraded and vacuumed off before tiling[2].
- Timber floors. Loose boards are refixed. A floor that bounces because a joist is damaged is a structural repair, assessed on site, not hidden under a thicker board.
- Existing tiles or vinyl. A loose or cracked covering comes up. A sound one may be covered if the new product allows it, after the asbestos check below.
For tiles on timber, The Tile Association's FAQ gives 15 mm as the minimum plywood overlay recommended in BS 5385-3. It is screwed to the joists without damaging pipes or cables below[1]. Its 2026 Tiling Guide says plywood and other wood-based boards should not be used for direct tiling[2]. Chipboard is a wood-based board too. So the build-up over timber comes from the tile and adhesive makers' system, and is written into the floor tiling scope.
3. Check the moisture
A base must be dry before tiling[2]. The Tile Association gives these drying figures:
Sand and cement screed. Cure for at least 7 days, kept from drying too fast, for example under polythene. Then allow a further 2 weeks to dry[1].
Calcium sulfate screed. Allow 1 day per mm up to 40 mm, then 2 days per mm, in a ventilated room at 20°C or more. The target is no more than 1% moisture by weight, or 75% relative humidity[2]. On that rule, a 50 mm screed needs about 60 days.
These figures are for tiling under set conditions, and a reading is still taken before laying. For a concrete slab, the adhesive or flooring maker sets the limit and the test. For wood, the board's instructions set the subfloor moisture limit, the test, any damp-proof membrane and any time the boards need in the room. The wood flooring scope should name the board, so those instructions are known before a date is fixed.
4. Check levels and flatness
A base must be suitably level for the fixing method intended[2]. For floor tiling, the guidance is to check the overall flatness and use a levelling compound if required. Ready-mixed adhesives usually have a maximum bed depth of 3 mm and are not suitable for floors. Some surfaces need priming, and the data sheet says which[2]. Wood boards and their underlay have their own flatness limits.
Each layer adds height, from levelling compound to the finished floor. Add them up early: the total decides what happens at the doors and the kitchen units.
5. Plan the edges and interfaces
- Doors. A higher floor can mean trimming doors and fitting a threshold strip to the next room. Check how any step will sit at outside doors.
- Kitchen units. The floor goes in before the units or up to the plinths afterwards. Decide at layout stage, because it changes unit heights and whether appliances slide out.
- Skirting. It either comes off and goes back over the floor, or stays with a beading. Any expansion gap the board's instructions require is hidden there.
Water underfloor heating. For tiles, it should be fully commissioned in controlled stages, before and after tiling, following the maker's guidance on drying times, adhesives and grouts[2]. Under wood, follow the board's instructions.
Electric underfloor heating. A new circuit is notifiable, and so is altering a circuit in the space around a bath or shower. Notifiable work is self-certified by an installer registered with a competent person scheme. Otherwise it is inspected, approved and certificated by a building control body or, in England, a third-party certification scheme electrician, who must be notified before work starts[5].
6. Agree who prepares and removes what
Preparation and laying can fall to different people. Agree in writing who handles:
- Lifting and disposing of the old covering, gripper and underlay.
- Moving furniture and appliances out and back.
- Removing and refitting skirting, doors, plinths and any radiators in the way.
- Base repairs: refixing boards, filling, levelling, priming, overlays or membranes.
- Moisture readings: who takes them, and against which limit.
- Commissioning underfloor heating, and connecting and certifying an electric system.
Before work starts you get a written scope with the quotation. It states what is included, what is not, and what is provisional because it cannot be known until the old floor is up.
Old vinyl and floor tiles: check for asbestos first
Asbestos may be part of any home built or refurbished before 2000[3]. HSE lists PVC and thermoplastic floor tiles, sheet coverings and screeds among the floor materials it was added to. Some were stuck down with mastics containing it, and old tiles can be hidden under carpet. They can be hard to identify[4].
Do not lift, scrape, sand or grind it yourself
HSE advises against repairing or removing asbestos materials yourself without training for non-licensed asbestos work. Materials assessed as in good condition and unlikely to be damaged should be left in place and monitored[3]. Grinding off flooring materials needs an HSE licensed contractor, and anyone who thinks they have found asbestos must stop work[4]. Analysts for asbestos work must be accredited by UKAS[3]. Their result decides whether the old floor is covered or removed, and by whom.
What each type of base needs
Where the table says the product sets the limit, the figure comes from the chosen adhesive, board or membrane.
Subfloor checks by type of base
| Existing floor | What gets checked | Published guidance and where limits come from |
|---|---|---|
| New sand and cement screed | Curing, drying, surface strength, flatness | Cure at least 7 days, protected, then dry a further 2 weeks before tiling[1]; for wood, the board's instructions |
| New calcium sulfate screed | Drying, moisture reading, surface laitance | 1 day per mm up to 40 mm, 2 days per mm beyond, to no more than 1% by weight or 75% RH; laitance removed[2] |
| Concrete slab | Dryness, flatness, old adhesive or paint | Clean, dry and level for the fixing method[2]; moisture limit from the product's maker |
| Suspended timber floor | Loose boards, bounce, damaged timber, services below | Plywood overlay at least 15 mm under BS 5385-3[1]; wood-based boards not for direct tiling[2] |
| Chipboard deck | Movement, moisture damage, fixings | Wood-based board, not for direct tiling[2]; for wood, the board's instructions |
| Existing tiles | Bond, cracks, hollow areas, added height | Clean and stable; priming may be needed[2]; the new product's instructions decide |
| Old vinyl or thermoplastic tiles | Age of the building, possible asbestos | May contain asbestos if pre-2000[3][4]; not disturbed until identified |
Scroll sideways to see all columns
What can turn up when the old floor comes up
Hollow or loose screed. The base must be stable[2], so it is repaired before laying.
- A damp reading. More drying time, or a membrane the product's maker approves. A leak is fixed first.
- A floor well out of level. Levelling raises the floor, so doors may need trimming. A large fall is looked at before it is levelled over.
Old adhesive or paint. The base must be clean[2], so residues are removed or primed as the data sheet directs.
Possible asbestos. Work on that covering stops until it is identified[4].
Anything that departs from the scope is agreed with you before it is built.
What a ready subfloor looks like
At the end of preparation, the base is clean, sound and stable, dry to the product's limit and flat enough for the fixing method. The finished height is known, and the doors, skirting, plinths and heating each have an agreed plan. The floor then goes down, with whatever curing time the adhesive and grout instructions set. At handover you receive the certificates and sign-offs that apply to the work done. Looking after the floor is covered in caring for the installed floor.